Whenever you need to install a picture, a lamp or a new TV on your wall, you’ll need to find the existing studs. If you have your home’s blueprints at hand, you just need a little of common sense to find each stud. But, if you don’t have them, you’ll need to effort a bit more.
However, using a Stanley stud finder can turn the tedious searching process into a breeze. But, before getting started, is necessary that you learn some basic lessons about these tools. So, if it’s the first time you use a stud finder and you don’t know where to start, don’t worry.
In this article, you’ll learn how to use a Stanley stud finder like a pro. Also, you’ll find some valuable information about these electronic gadgets to better understand how they work.
What is Stanley Stud Finder?
Stanley is one of the most popular brands of hand tools in the world. This company founded by Frederick Stanley in 1843, originally started as a manufacturer of door accessories and bolts. Then, in 1857, Frederick’s cousin, Henry Stanley, founded a division of the company dedicated to the mass production of hand tools.
Today, Stanley products are sold worldwide. Their screwdrivers, utility knives, drills and saws are among their top-selling products. Stanley stud finders are also very popular, because they’re practical, lightweight and easy to use.
Stud finders are electronic tools that allow you to locate fasteners, studs and live wires behind the walls. First stud finders used magnets enclosed inside plastic casings. Obviously, magnets can’t detect hardwood studs, but they can detect metal fasteners.
When the magnet was near a fastener, the magnetic force stuck the finder to the wall. Also, the impact of the magnet against the plastic casing worked as an alert signal. However, these models were too inaccurate, especially if the wall covering was too thick.
Neodymium magnets were the solution to this problem. However, magnetic stud finders were still unable to differentiate between fasteners, studs, wires and other metal elements. But everything changed in 1977, when Robert Franklin patented the first electronic stud finder.
Between 1977 and 1998, Zircon Corporation acquired the exclusive rights for the mass production of these devices. But, when the patent expired, Stanley and other companies were able to develop their own models.
How do Stanley Stud Finders Work?
Stanley stud finders use a complex system of capacitors and sensors that measure changes in the dielectric constant of the wall. The dielectric constant varies with density changes. For example, in the presence of hardwood studs, the value of the dielectric constant decreases. This variation activates the alarm signals on the stud finder.
Step by Step Guide to Use A Stanley Stud Finder
To use a Stanley stud finder, you just need to follow these steps:
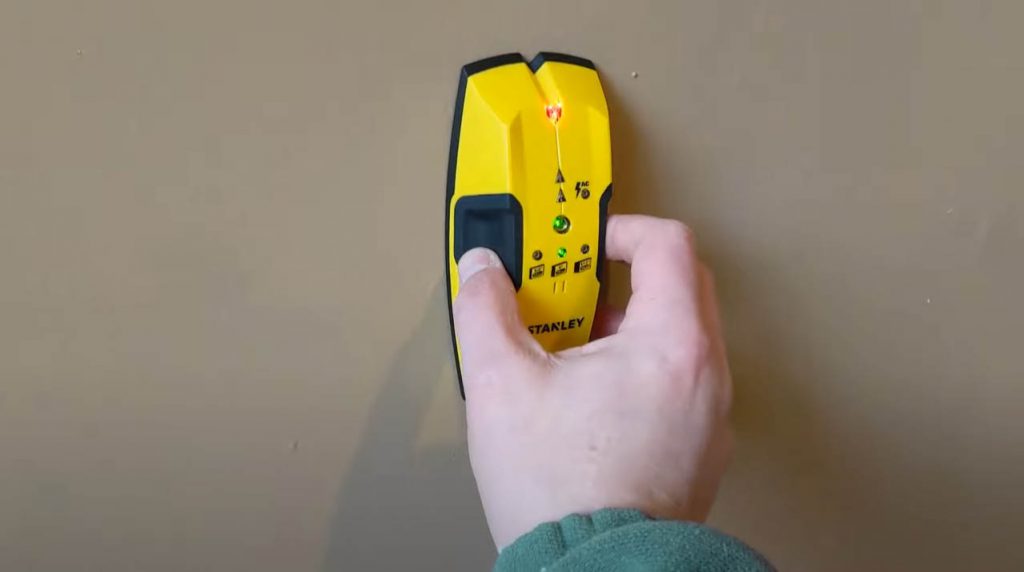
- First of all, turn on the stud finder by pressing the on/off button. If nothing happens, maybe you’ll need to replace the battery. These devices use a single 9-volt rectangular battery. To install them, just open the lid behind the tool, put the battery in place and then close the lid.
- After that, you’ll need to calibrate your stud finder. To do it, place your tool on the wall and keep pressed both buttons located on the left and right side. The tool must be on a clear area, away from studs and live wires.
- Then, run the stud finder over the wall. If nothing happens, maybe there was a stud behind the place where you initially calibrated your tool. So, recalibrate your stud finder on a different point.
- Pay attention to any alert signal from your tool. When you’re in presence of a wooden stood, you’ll hear a beep sound. When you reach the middle point of the stud, the sound becomes constant and louder.
- After that, use a pencil to mark the exact point. Stanley stud finders have a small groove in the center for this purpose.
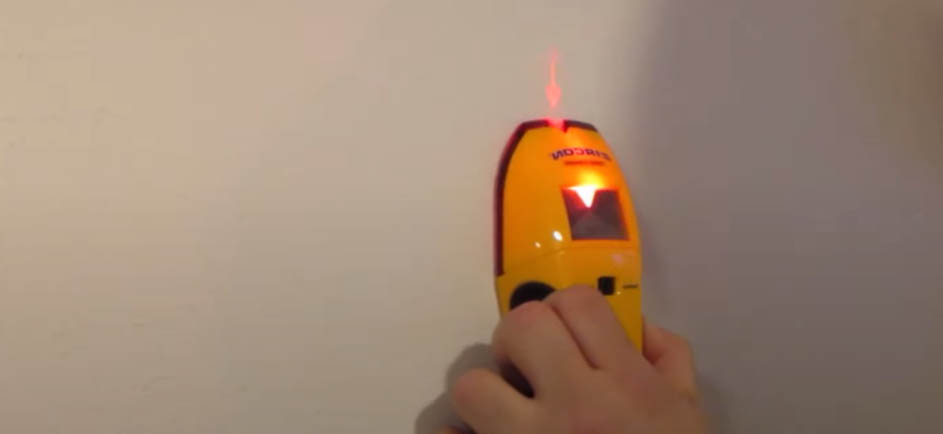
These tools can also detect live AC wires, but their alert signal is different. In these cases, a red light begins to flash, indicating the presence of electric current.
Conclusion
Certainly, modern stud detectors are much more accurate than those rudimentary magnetic models. In the past, finding studs behind a wall was a blind search. There was no practical way to differentiate the density of different materials.
Fortunately, everything changed with the development of the first electronic models. By using a complex system of capacitors and sensors, electronic models can differentiate materials and determine the exact location of studs and wires.
For a more accurate detection, follow each of the steps described on this article. Also remember to properly calibrate your tool and change the battery if necessary.